
| 일 | 월 | 화 | 수 | 목 | 금 | 토 |
|---|---|---|---|---|---|---|
| 1 | 2 | 3 | ||||
| 4 | 5 | 6 | 7 | 8 | 9 | 10 |
| 11 | 12 | 13 | 14 | 15 | 16 | 17 |
| 18 | 19 | 20 | 21 | 22 | 23 | 24 |
| 25 | 26 | 27 | 28 | 29 | 30 | 31 |
- gcc 업데이트
- subporcess path
- c++ 정규식
- c3 step graph
- semanage
- 1697
- InfluxDB
- selinux port 등록
- c3 축 없애기
- snmp
- influxdb 설치
- c3 초
- regex_search
- 정규식 문자열 출력
- grafana dashboard
- 정규식 컴파일
- gcc regex
- linux시간으로 변경
- CentOS7
- 백준
- python popen
- 정규식 활용
- python os
- g++ 업데이트
- python subprocess
- snmp test
- telegraf
- c3 축 가리기
- centos pyhon 설치
- c3 second
- Today
- Total
리셋 되지 말자
[express] session & auth 인증 구현 본문
UI 만들기
로그인 버튼을 만든다.
- templage.js
var template = {
html: function (title, list, body, control) {
return `
<!doctype html>
<html>
<head>
<title>WEB1 - ${title}</title>
<meta charset="utf-8">
</head>
<body>
<a href="/auth/login">login</a>
<h1><a href="/">WEB</a></h1>
<a href="/author">author</a>
<ol>
${list}
</ol>
${control}
${body}
</body>
</html>
`;
},
list: function (topics) {
var list = '';
topics.forEach((topic) => {
list = list + `<li><a href="/page/${topic.id}">${topic.title}</a></li>`;
});
return list;
},
author: function (authors, author_id) {
var tag = ``;
var selected = '';
authors.forEach(author => {
if (author_id === author.id) {
selected = ' selected';
} else {
selected = '';
}
tag = tag + `<option value="${author.id}" ${selected}>${author.name}</option>\n`;
});
return `<select name="author">
${tag}
</select>`;
},
authorTable: function (authors) {
var table = `<table border="1px" style="border-collapse: collapse;">
<tr>
<td>이름</td>
<td>프로필</td>
<td>수정</td>
<td>삭제</td>`;
authors.forEach(function (author) {
table += `<tr>
<td>${author.name}</td>
<td>${author.profile}</td>
<td><a href="/author/update?id=${author.id}">update</a></td>
<td>
<form action="/author/delete_process" method="POST">
<input type="hidden" name="id" value="${author.id}">
<input type="submit" value="delete">
</form>
</td></tr>`
});
table += `</table>`;
return table;
}
}
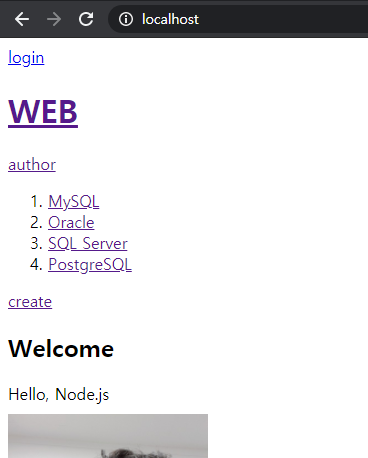
module.exports = template;login링크를 클릭하면 /auth/login 으로 이동하도록 했다.
- 접속 화면
auth 라우터 생성
auth라는 이름으로 라우터를 생성한다.
- auth.js
var express = require('express');
var router = express.Router();
var db = require('../lib/db');
var template = require('../lib/template');
router.get('/login', (req, res) => {
db.query('SELECT * FROM topic', function (error, topics) {
if (error) throw error;
var title = 'Login';
var description = '';
var list = template.list(topics);
var html = template.html(title, list, `<h2>${title}</h2>
<form action="/auth/login_process" method='POST'>
<p>
<input type="text" name="email" placeholder="email">
</p>
<p>
<input type="password" name="pwd" placeholder="password">
</p>
<input type="submit" value="로그인">
</form>${description}`, ``);
res.send(html);
});
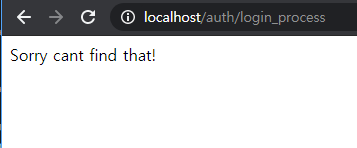
});로그인 버튼 클릭 시, /auth/login_process로 이동하도록 설정
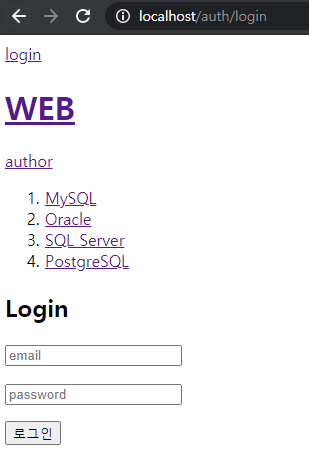
- localhost/auth/login 접속화면
로그인 세션 구현
헤더 부분에 임시로 사용할 사용자 데이터를 선언한다.
- auth.js의 윗부분
var express = require('express');
var router = express.Router();
var db = require('../lib/db');
var template = require('../lib/template');

var authData = {
    email:'rudwns273@naver.com',
    password:'111111',
    nickname:'rudwns273'
}
- login_process 라우터
router.post('/login_process', (req, res)=>{
    console.log(req.body);
    if(req.body.email == authData.email && req.body.pwd == authData.password){
        res.send('login successed');
    }else{
        res.send('login failed');
    }
})
로그인 화면에서 email과 패스워드를 입력했을 때의 콘솔 출력은 아래와 같다.
Example app listening at http://localhost:80
[Object: null prototype] { email: 'asdf', pwd: '12' }
body-parser 미들웨어를 사용했으므로 req.body에 객체로 내용이 들어있는 것을 확인할 수 있다.
세션 미들웨어 설치
npm으로 express-session, session-file-store을 설치한 뒤, main.js위에 선언 및 use 한다.
const express = require('express')
const app = express()
const port = 80
var compression = require('compression')
var bodyParser = require('body-parser');
var pageRouter = require('./routes/page');
var indexRouter = require('./routes/index');
var authorRouter = require('./routes/author');
var authRouter = require('./routes/auth');
var helmet = require('helmet')
var session = require('express-session');
var FileStore = require('session-file-store')(session);


app.use(helmet());
app.use(express.static('public'));
app.use(bodyParser.urlencoded({ extended: false }));
app.use(compression());
app.use(session({
    secret: 'sknfienf123',
    resave: false,
    saveUninitialized: true,
    store:new FileStore()
}))
- auth.js의 /login_process를 처리하는 라우터 함수
router.post('/login_process', (req, res)=>{
    console.log(req.session);
    if(req.body.email == authData.email && req.body.pwd == authData.password){
        req.session.is_logined = true;
        req.session.nickname = authData.nickname;
        res.send('loing successed');
    }else{
        res.send('login failed');
    }
})
로그인에 성공하면, 요청 session의 is_logined 값을 true로 설정하고 session의 nickname 값을 authData의 nickname 값으로 설정한다. 그리고 로그인을 진행해본다.
로그인 성공 시에 콘솔에 출력된 내용은 아래와 같다.
Session {
  cookie: { path: '/', _expires: null, originalMaxAge: null, httpOnly: true },
  __lastAccess: 1601217743814
}
Session {
  cookie: { path: '/', _expires: null, originalMaxAge: null, httpOnly: true },
  __lastAccess: 1601217747786,
  is_logined: true,
  nickname: 'rudwns273'
}
처음 'localhost'에 접속시, session에는 is_logined와 nickname이 없지만, 로그인 성공후에는 값이 생긴것을 확인할 수 있다. 정상적으로 동작하는것을 확인했으니 '/'페이지로 접속하도록 코드를 수정하도록 하자.
router.post('/login_process', (req, res)=>{
    if(req.body.email == authData.email && req.body.pwd == authData.password){
        console.log(req.session);
        req.session.is_logined = true;
        req.session.nickname = authData.nickname;
        req.session.save(function(){
            res.redirect('/');
        });


    }else{
        res.send('login failed');
    }
})
seesion.save 함수는, requset의 session에 값을 추가하거나 변경하는 작업을 하게되면 메모리에 session에 값을 저장하는데, 이때 시간이 오래 걸릴 수 있으므로 저장하는 작업이 다 끝나면 인자로 주어진 콜백함수가 실행되도록 하는 함수이다.
인증 상태를 UI에 반영
로그인을 하면, login 링크가 logout으로 변경되도록 한다.
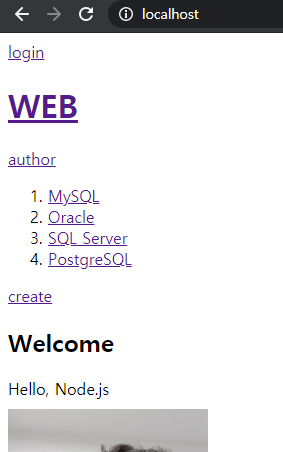
router.get('/', (req, res) => {
    db.query('SELECT * FROM topic', function (error, topics) {
        if (error) throw error;
        console.log(req.session);
        var description = 'Hello, Node.js';
        var title = 'Welcome';
        var list = template.list(topics);

        var html = template.html(title, list, `<h2>${title}</h2>${description}
        <img src="/image/profile.jpg" style="width:200px; display:block; margin-top:10px;">`, `<a href="/page/create">create</a>`);
        res.send(html);

    });
});
'/'를 처리하는 라우터 쪽에 console.log로 reqest의 session을 출력해본다. 결과는 아래와 같다.
Session {
  cookie: { path: '/', _expires: null, originalMaxAge: null, httpOnly: true },
  __lastAccess: 1601218311894,
  is_logined: true,
  nickname: 'rudwns273'
}
is_logined를 이용하여 '/' 라우터 함수를 수정하자.
- template.js
var template = {
  html: function (title, list, body, control, authStatusUI='<a href="/auth/login">login</a>') {
    return `
        <!doctype html>
    <html>
    <head>
      <title>WEB1 - ${title}</title>
      <meta charset="utf-8">
    </head>
    <body>
      ${authStatusUI}
      <h1><a href="/">WEB</a></h1>
      <a href="/author">author</a>
      <ol>
        ${list}
      </ol>
      ${control}
      ${body}
    </body>
    </html>
    `;
  }
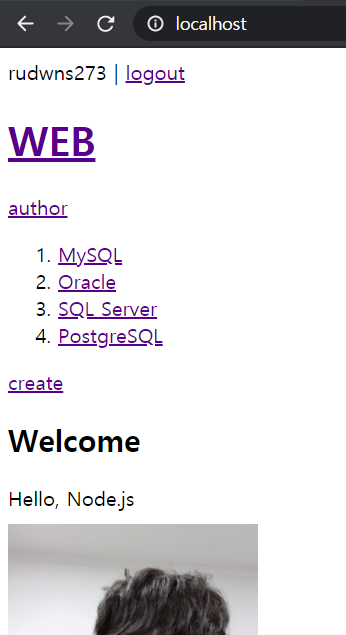
로그인 성공 화면
UI 반영 2
현재 루트 페이지에만 로그인이 된 상태에서 닉네임과 로그아웃 버튼이 생기므로, 이를 다른 페이지들에게도 적용해주어야 한다. 사용이 용이하도록 별도의 모듈 파일로 제작하도록 한다. /lib 경로에 auth.js로 생성
- auth.js
module.exports = {
    isOwner:function (req, res){
        if(req.session.is_logined == true){
            return true;
        } else {
            return false;
        }
    },
    statusUI:function (req, res){
        var authStatusUI = '<a href="/auth/login">login</a>';
            if(this.isOwner(req, res)){
                authStatusUI = `${req.session.nickname} | <a href="/auth/login">logout</a>`;
            }
        return authStatusUI;
    }
}
- template.js
var template = {
  html: function (title, list, body, control, authStatusUI='<a href="/auth/login">login</a>') {
    return `
        <!doctype html>
    <html>
    <head>
      <title>WEB1 - ${title}</title>
      <meta charset="utf-8">
    </head>
    <body>
      ${authStatusUI}
      <h1><a href="/">WEB</a></h1>
      <a href="/author">author</a>
      <ol>
        ${list}
      </ol>
      ${control}
      ${body}
    </body>
    </html>
    `;
  },
  list: function (topics) {
    var list = '';
    topics.forEach((topic) => {
      list = list + `<li><a href="/page/${topic.id}">${topic.title}</a></li>`;
    });
    return list;
  },
  author: function (authors, author_id) {
    var tag = ``;
    var selected = '';
    authors.forEach(author => {
      if (author_id === author.id) {
        selected = ' selected';
      } else {
        selected = '';
      }
      tag = tag + `<option value="${author.id}" ${selected}>${author.name}</option>\n`;
    });
    return `<select name="author">
                ${tag}
              </select>`;
  },
  authorTable: function (authors) {
    var table = `<table border="1px" style="border-collapse: collapse;">
                <tr>
                    <td>이름</td>
                    <td>프로필</td>
                    <td>수정</td>
                    <td>삭제</td>`;
    authors.forEach(function (author) {
      table += `<tr>
                    <td>${author.name}</td>
                    <td>${author.profile}</td>
                    <td><a href="/author/update?id=${author.id}">update</a></td>
                    <td>
                      <form action="/author/delete_process" method="POST">
                        <input type="hidden" name="id" value="${author.id}">
                        <input type="submit" value="delete">
                      </form>
                    </td></tr>`
    });
    table += `</table>`;
    return table;
  }
}
module.exports = template;
template.html에 마지막 인자에 login 상태를 추가하였다.
- index.js
var express = require('express');
var router = express.Router();
var db = require('../lib/db');
var template = require('../lib/template');
var auth = require('../lib/auth');


//get은 route, routing
router.get('/', (req, res) => {
    db.query('SELECT * FROM topic', function (error, topics) {
        if (error) throw error;
        var description = 'Hello, Node.js';
        var title = 'Welcome';
        var list = template.list(topics);

        var html = template.html(title, list, `<h2>${title}</h2>
        ${description}
        <img src="/image/profile.jpg" style="width:200px; display:block; margin-top:10px;">`, `<a href="/page/create">create</a>`,
        auth.statusUI(req, res));
        res.send(html);

    });
});

module.exports = router;
(생략)
로그아웃
- auth.js
module.exports = {
    isOwner:function (req, res){
        if(req.session.is_logined == true){
            return true;
        } else {
            return false;
        }
    },
    statusUI:function (req, res){
        var authStatusUI = '<a href="/auth/login">login</a>';
            if(this.isOwner(req, res)){
                authStatusUI = `${req.session.nickname} | <a href="/auth/logout">logout</a>`;
            }
        return authStatusUI;
    }
}
로그아웃 버튼을 클릭하면, /auth/logout으로 이동하도록 경로를 수정한다.
- /auth 라우터의 /logout 처리 미들웨어
router.get('/logout', (req,res)=>{
    req.session.destroy(function(err){
        if(err) throw err;
        res.redirect('/');
    })
})
reqest.session의 destroy를 사용하고 세션을 없애도록 한다. 그리고 홈 화면으로 돌아가도록 한다.
- 로그아웃 테스트
로그인에 성공했을 때 is_logined와 nickname이 기록된 세션 파일이 생기는데, 로그아웃을 누르면,

기존의 있던 session 파일이 사라지고 새로운 세션 파일이 생성되는 것을 확인할 수 있다. 물론 화면도 logout된 화면으로 돌아간다.
접근제어
로그인을 하지 않은 상태에서는 create, update, delete를 할 수 없도록 수정한다.
if(!auth.isOwner(req, res)){
        res.redirect('/');
        return false;
    }
위의 코드를 /create_process, /update_process, /delete_process의 상단에 추가해주도록 한다.
'NodeJS > 생활코딩' 카테고리의 다른 글
| [NodeJS] Passport 설치 (0) | 2020.09.28 |
|---|---|
| [express] session 추가사항 (0) | 2020.09.28 |
| [express] session store (0) | 2020.09.27 |
| [express] session 객체 (0) | 2020.09.27 |
| [express] session 옵션 (0) | 2020.09.27 |

