
| 일 | 월 | 화 | 수 | 목 | 금 | 토 |
|---|---|---|---|---|---|---|
| 1 | 2 | 3 | ||||
| 4 | 5 | 6 | 7 | 8 | 9 | 10 |
| 11 | 12 | 13 | 14 | 15 | 16 | 17 |
| 18 | 19 | 20 | 21 | 22 | 23 | 24 |
| 25 | 26 | 27 | 28 | 29 | 30 | 31 |
- InfluxDB
- semanage
- grafana dashboard
- centos pyhon 설치
- linux시간으로 변경
- snmp
- CentOS7
- 정규식 활용
- selinux port 등록
- gcc 업데이트
- c3 second
- c3 초
- telegraf
- python os
- gcc regex
- 정규식 컴파일
- 1697
- c3 step graph
- c++ 정규식
- 정규식 문자열 출력
- subporcess path
- g++ 업데이트
- python subprocess
- 백준
- snmp test
- python popen
- c3 축 가리기
- regex_search
- influxdb 설치
- c3 축 없애기
- Today
- Total
리셋 되지 말자
csapi 프로젝트 (7) - 이미지 저장 기능 추가 본문
https://not-to-be-reset.tistory.com/343 글에 작성한 대로, 모델 다운로드 링크가 만료되고 코드가 동작하지 않아서 다시 포스팅 합니다.
단일 인스턴스 부터 쿠버네티스 클러스터까지 확장해 나가려고 합니다.
개발환경
2023. 7. 22 기준 wsl 윈도우에서 진행
github 주소
https://github.com/kyeongjun-dev/csapi
커밋 : https://github.com/kyeongjun-dev/csapi/tree/3fa73bfc44b0056893793190c6d3532873d626fa
docker-compose.yml 수정
django 컨테이너에서 업로드한 이미지를 celery 컨테이너에서 처리할수 있도록 하기 위해 docker-compose.yml에 volume을 추가하고, django, celery 컨테이너의 /csapi/images 경로를 마운트합니다.
version: "3"
services:
  django:
    build:
      context: ./django
    command: python manage.py runserver 0.0.0.0:8080
    ports:
      - "8080:8080"
    volumes:
      - image_volume:/csapi/images

  worker:
    build:
      context: ./celery
    command: celery -A csapi.tasks worker --loglevel=info --max-tasks-per-child 1 -c 1
    volumes:
      - image_volume:/csapi/images

  rabbit:
    image: rabbitmq:3-management
    expose:
      - "5672"
    ports:
      - "15672:15672"
    environment:
      - RABBITMQ_DEFAULT_USER=guest
      - RABBITMQ_DEFAULT_PASS=guest

volumes:
  image_volume:
이미지를 보여주는 템플릿 추가
업로드한 이미지와 처리된 이미지를 보여줄 django/templates/show_image.html 파일을 아래와 같이 추가합니다.
<html>
    <head>

    </head>
    <body>
        <h1> hello world </h1>
        {% block content %}
        <img src="{% url 'serve_image' image_name %}" alt="Uploaded Image">
        {% endblock %}
    </body>
</html>
url 추가
django/config/urls.py 파일을 수정해서 localhost:8080/image, localhost:8080:/upload-image 경로에 대한 views 함수를 실행할 수 있도록 추가해 줍니다.
from django.contrib import admin
from django.urls import path
from csapi import views

urlpatterns = [
    path('admin/', admin.site.urls),
    path('', views.index, name='index'),
    path('api/', views.run_api, name='run_api'),
    path('image/<str:image_name>/', views.show_image, name='show_image'),
    path('uploaded_image/<str:image_name>/', views.serve_image, name='serve_image'),
]
views.py 수정
위에서 django/config/urls.py 파일에 추가한 localhost:8080/image, localhost:8080:/upload-image url에 대한 함수를 수정합니다. 수정할 파일은 django/csapi/views.py 입니다.
6~8 : django/config/settings.py에 선언되어 있는 BASE_DIR의 값을 사용하기 위해 import 해주고, 이미지 파일 이름을 uuid로 대체하기 위해 uuid를 import 합니다.
23~35 : 업로드된 이미지 파일의 이름과 처리된 이미지 파일의 이름을 uuid로 대체한 뒤, 각 파일을 저장합니다. 순서를 설명하자면 '이미지 업로드 > 업로드된 이미지 저장 > 저장된 이미지를 celery에 처리하도록 celery task 실행' 순서 입니다.
36~48 : show image 함수는 show_image.html 템플릿 파일을 반환하며, show_image.html에서는 바로 아래에 있는 serve_image를 호출하여 url의 파라미터로 전송된 파일에 이름에 해당하는 이미지를 보여줍니다.
from django.shortcuts import render
from django.http import HttpResponse
from celery import shared_task
from .tasks import api

from django.conf import settings

import uuid
# Create your views here.

def index(request):
    return render(request, 'index.html')

def run_api(request):
    if request.method == 'GET':
        return render(request, 'index.html')
    elif request.method == 'POST' and request.FILES['image']:
        uploaded_file = request.FILES['image']
        file_name = uploaded_file.name
        file_size = uploaded_file.size
        file_content_type = uploaded_file.content_type

        save_destination = str(settings.BASE_DIR) + '/images/'
        print(save_destination)
        input_image_name = str(uuid.uuid4()) + '.' + file_content_type.split('/')[1]
        output_image_name = str(uuid.uuid4()) + '.' + file_content_type.split('/')[1]
        print(input_image_name)
        with open(save_destination + input_image_name, 'wb') as destination:
            for chunk in uploaded_file.chunks():
                destination.write(chunk)

        print(file_name, file_size, file_content_type)
        api.delay(save_destination + input_image_name, save_destination + output_image_name)
        print(output_image_name)
        return HttpResponse(input_image_name + '\n' + output_image_name)

def show_image(request, image_name):
    context = {
        'image_name': image_name,
    }
    return render(request, 'show_image.html', context)

def serve_image(request, image_name):
    image_dir = str(settings.BASE_DIR) + '/images/' + image_name
    try:
        with open(image_dir, 'rb') as image_file:
            return HttpResponse(image_file.read(), content_type='image/png')
    except FileNotFoundError:
        return HttpResponse('Image Not Found')
celery task 수정
먼저 django/csapi/tasks.py 파일을 아래와 같이 수정합니다. 변경사항은 매개변수가 기존에는 input_file_name 하나만 있었는데, celery 컨테이너에서 읽어올 파일을 가르키는 input_image_name, celery 컨테이너가 처리한 이미지 파일을 가르키는 output_image_name으로 변경됐습니다.
from celery import shared_task

@shared_task
def api(input_image_name, output_image_name):
    return input_image_name + output_image_name
다음으로 celery/csapi/tasks.py 파일을 아래와 같이 수정합니다. 수정된 부분은 api 함수이며, 위와 마찬가지로 매개변수가 변경되었고, 매개변수로 넘어온 input_image_name과 output_image_name을 사용하도록 수정됐습니다.
import cv2
import numpy as np
from tensorflow.keras.models import load_model
import tensorflow as tf

class fashion_tools(object):
    def __init__(self,imageid,model,version=1.1):
        self.imageid = imageid
        self.model   = model
        self.version = version

    def get_dress(self,stack=False):
        """limited to top wear and full body dresses (wild and studio working)"""
        """takes input rgb----> return PNG"""
        name =  self.imageid
        file = cv2.imread(name)
        file = tf.image.resize_with_pad(file,target_height=512,target_width=512)
        rgb  = file.numpy()
        file = np.expand_dims(file,axis=0)/ 255.
        seq = self.model.predict(file)
        seq = seq[3][0,:,:,0]
        seq = np.expand_dims(seq,axis=-1)
        c1x = rgb*seq
        c2x = rgb*(1-seq)
        cfx = c1x+c2x
        dummy = np.ones((rgb.shape[0],rgb.shape[1],1))
        rgbx = np.concatenate((rgb,dummy*255),axis=-1)
        rgbs = np.concatenate((cfx,seq*255.),axis=-1)
        if stack:
            stacked = np.hstack((rgbx,rgbs))
            return stacked
        else:
            return rgbs

    def get_patch(self):
        return None

from celery import Celery, current_task

app = Celery('tasks', broker="pyamqp://guest:guest@rabbit:5672//")

import uuid

@app.task
def api(input_image_name, output_image_name):
    saved = load_model("./model.h5")
    api = fashion_tools(input_image_name, saved)
    image_ = api.get_dress(False)
    file_type = input_image_name.split('.')[1]
    cv2.imwrite(output_image_name, image_)
    #return current_task.request.id
    return input_image_name + output_image_name
테스트
docker compose up --build 명령어로 실행시킨 뒤, 이미지를업로드 합니다.

업로드를 하면 아래 그림과 같이 두 개의 이미지 파일 이름을 확인할 수 있습니다.
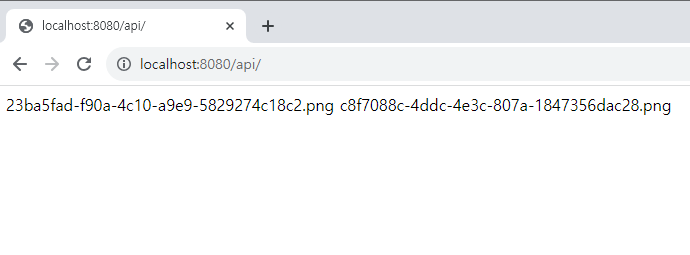
첫 번째 파일 이름을 입력하면 (localhost:8080/image/<파일이름>) 업로드한 이미지를 확인할 수 있습니다.
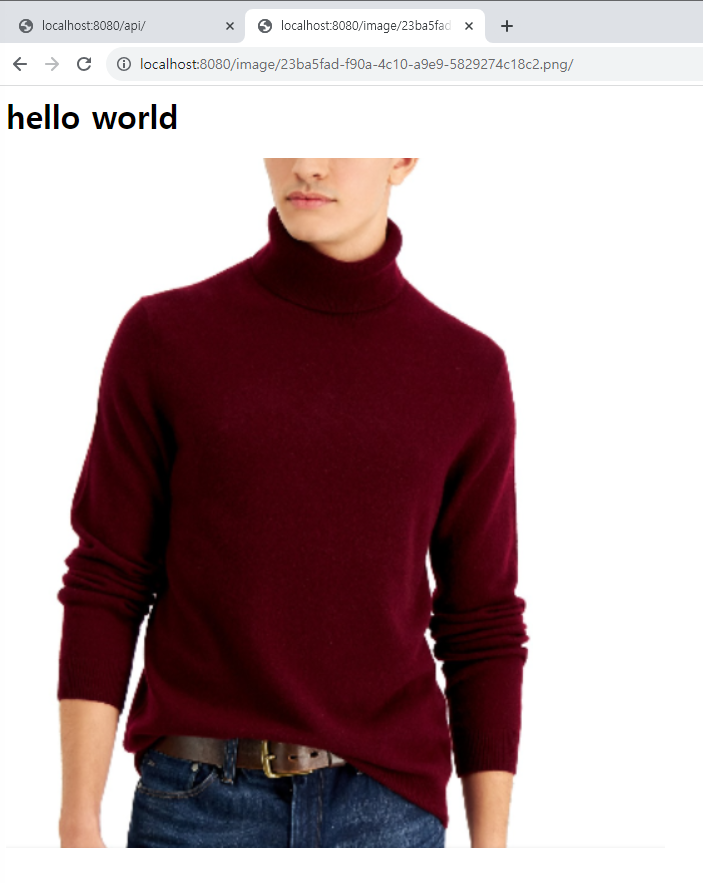
두 번째 파일 이름을 입력하면, 아래와 같이 처리된 이미지를 확인할 수 있습니다.

마무리
이제 핵심 기능은 완성되었습니다. url을 이용한 다양한 이동 등 부가적인 기능은 다루지 않을 생각입니다. 다음 글부터는 쿠버네티스 환경으로 변경하는 작업을 포스팅 하도록 하겠습니다.
'프로젝트' 카테고리의 다른 글
| csapi 프로젝트 (9) - minio 연동 (0) | 2024.03.03 |
|---|---|
| csapi 프로젝트 (8) - broker url 환경변수로 수정하도록 변경 (1) | 2023.10.08 |
| csapi 프로젝트 (6) - 이미지 업로드 기능 추가 (0) | 2023.09.06 |
| csapi 프로젝트 (5) - docker compose scaling 테스트 (0) | 2023.08.05 |
| csapi 프로젝트 (4) - django 추가 (0) | 2023.07.28 |


